
OCEANMAIL / RESELLER GUIDE
Install the WHMCS module
Install the provisioning module and addon, then connect your tenant.
1. Prepare
Activate your reseller agreement and check its enabled account types and limit. Obtain the WHMCS server’s real outbound public IP address.
- Check your WHMCS installation, PHP cURL and verified HTTPS connectivity.
- Allowlist the WHMCS server’s outbound IP in your OceanMail tenant API settings.
- A tenant owner or fully authorized administrator creates an API token and securely saves its one-time value.
- Download and extract the ZIP below.
Never put an API token in a chat, ticket, URL or screenshot.
Download WHMCS module ↓Includes the server module, addon and setup guide. Tested with WHMCS 8.12.1 and PHP 8.2.
2. Copy the module files
WHMCS_ROOT is your installation’s root directory containing configuration.php and modules. Copy the extracted paths into the matching locations.
- Copy modules/servers/mailoceanwhmcs/ from the ZIP to WHMCS_ROOT/modules/servers/mailoceanwhmcs/.
- Copy modules/addons/mailocean/ from the ZIP to WHMCS_ROOT/modules/addons/mailocean/.
- Keep all PHP, template and lib files inside each directory and ensure the web server can read them.
- This public ZIP does not include an includes/hooks directory, so no separate hook installation is needed.
Back up files and data before updating. If checkout or plan changes are separately managed, do not overwrite the addon or client area; coordinate with OceanMail.
3. Activate the addon
Addon Modules is a WHMCS administrator setting. Product Addons is a different feature.
- In the WHMCS admin area open Configuration → System Settings → Addon Modules.
- Activate OceanMail, then use Configure to grant access only to the appropriate administrator roles and save.
- From the top menu open Addons → OceanMail and select API connection.
If the addon is missing, check the path and read permissions for modules/addons/mailocean/mailocean.php.
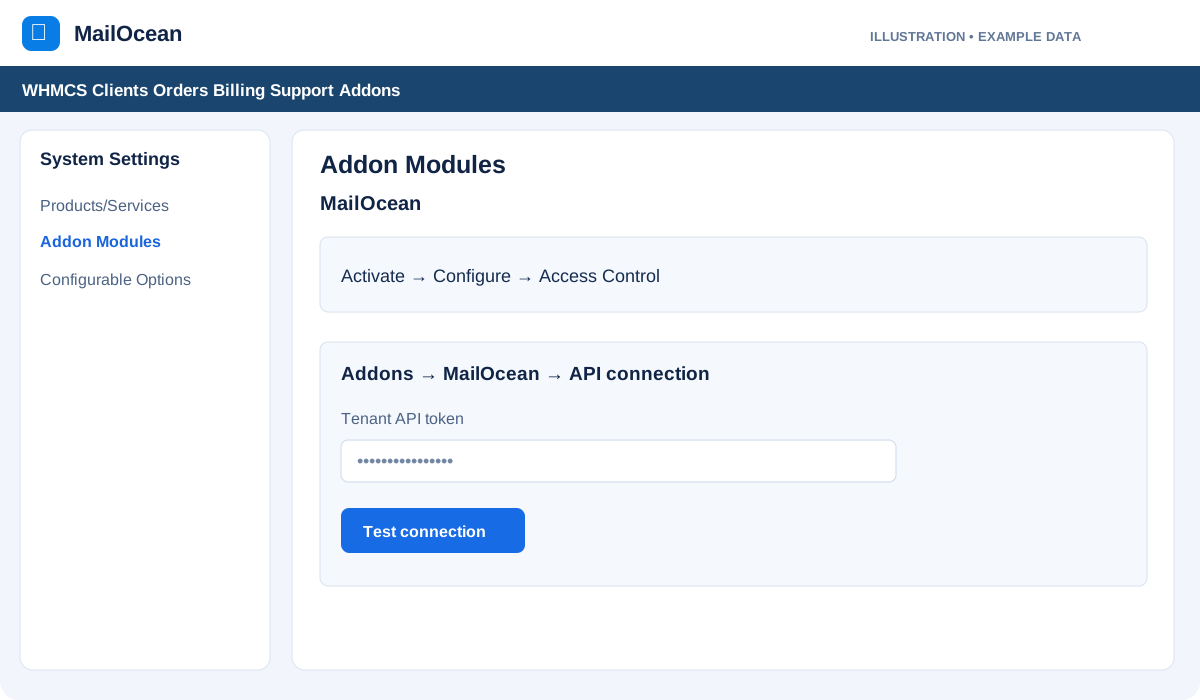
4. Verify the API connection
Enter the tenant API token only in the WHMCS addon’s API connection form.
- Enter and save the token under Addons → OceanMail → API connection.
- Test the connection and confirm the displayed organization is your reseller tenant.
- If it fails, check the token owner’s permissions, server outbound IP, network and TLS certificate.
Before changing tenant or credentials in an existing WHMCS installation, reconcile its current service bindings.
5. Set up products
After connecting, follow the WHMCS product setup guide to configure each product and its mailbox quantity.
- Create a separate product for every account type enabled in your agreement, such as 5 GB, 10 GB and 25 GB.
- Choose its OceanMail Plan and manually create and link a Mailbox Quantity configurable option.
- Set retail pricing, billing cycles, Require Domain and the setup trigger; verify an authorized test before selling.
Your OceanMail wholesale billing and the retail prices you set in WHMCS are separate.